
You can give your patio a fresh, cozy farmhouse look without hiring a pro or breaking the bank. This article shows simple, weekend-friendly DIY projects that let you mix weathered wood, soft textiles, and practical touches to make your outdoor space feel inviting and lived in.
You’ll get easy, doable ideas that fit small to large patios so you can pick projects that match your time and tools.
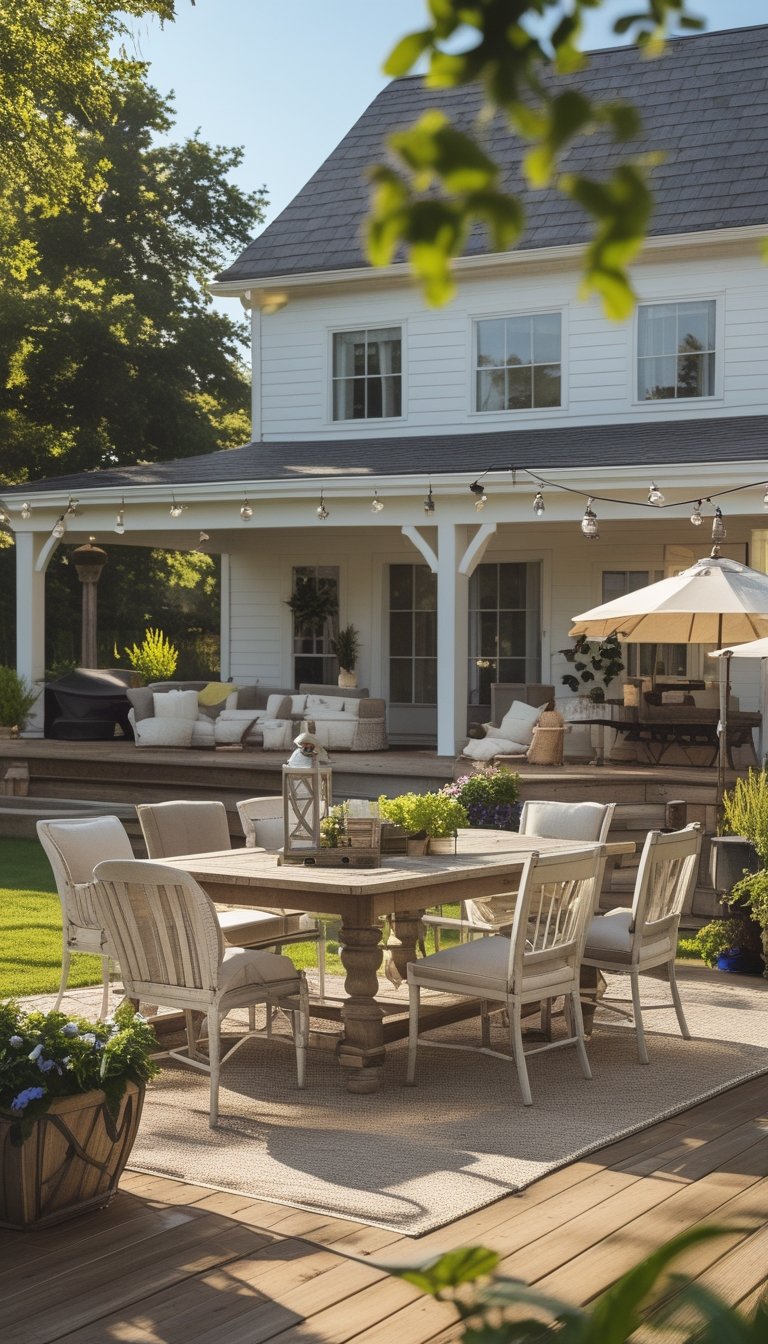
Tackle one project or combine a few to build a warm, rustic outdoor spot for meals, evenings by the fire, or quiet mornings with coffee. Follow practical steps and clear photos so you can turn basic materials into charming pieces that hold up outside.
Plan your weekend projects by grouping tasks that use similar tools and materials. For example, build any pallet furniture or reclaimed-wood pieces on the same day to reuse saws, drills, and finishing supplies. Measure your patio area first and sketch a simple layout to avoid buying extra lumber or hardware. Choose weatherproof finishes—exterior paint, spar urethane, or outdoor fabric—to protect your work and cut down on future maintenance. If you’re new to power tools, start with a small project like a mason-jar sconce or a painted chair to build confidence. Finally, pick lightweight pieces if you like to rearrange, and add one cozy textile, like a slipcover or outdoor rug, to tie the look together quickly.
1) Weathered pallet sofa with outdoor cushions
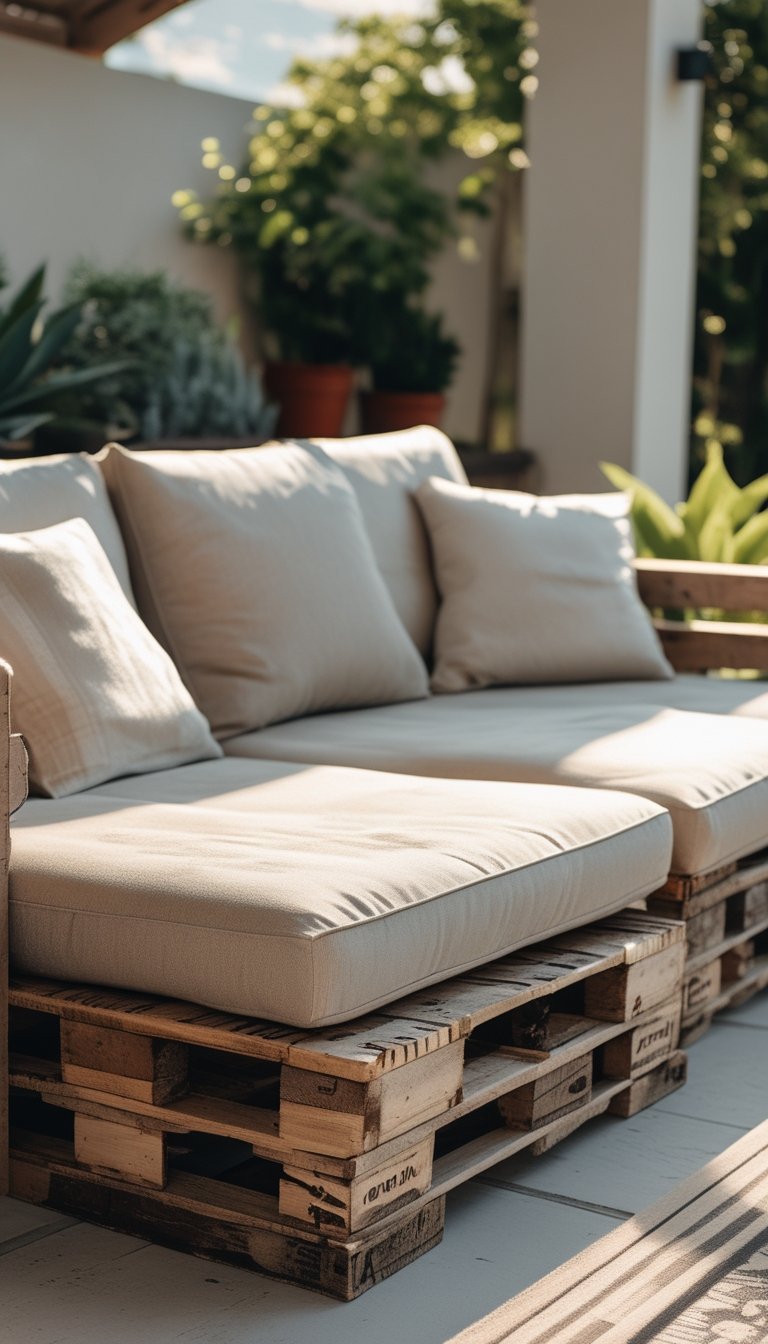
You can turn old pallets into a cozy farmhouse sofa with a few tools and basic skills. Stack and fasten pallets for the base and back, then sand rough edges to avoid splinters. Paint or stain them in a weathered gray or whitewash to get that farmhouse look.
Choose thick, water-resistant outdoor cushions in neutral tones like beige, cream, or muted blue. Add throw pillows with simple stripes or checks to keep the style rustic yet fresh. Anchor the sofa with a small outdoor rug and side table for drinks.
PRO TIP
When building your pallet sofa, pick pallets that are heat-treated (look for HT stamps) and avoid chemically treated wood. Reinforce joints with long screws and corner brackets so the sofa stays sturdy over time. Apply a clear outdoor sealant after painting to protect wood from rain and sun. Use outdoor-grade foam and fabric for cushions; quick-dry foam helps prevent mold and drying racks can keep cushions aired out. If you want mobility, add lockable caster wheels under the base. Finally, measure your space before cutting so the sofa fits your patio and allows easy traffic flow.
2) DIY reclaimed-wood coffee table
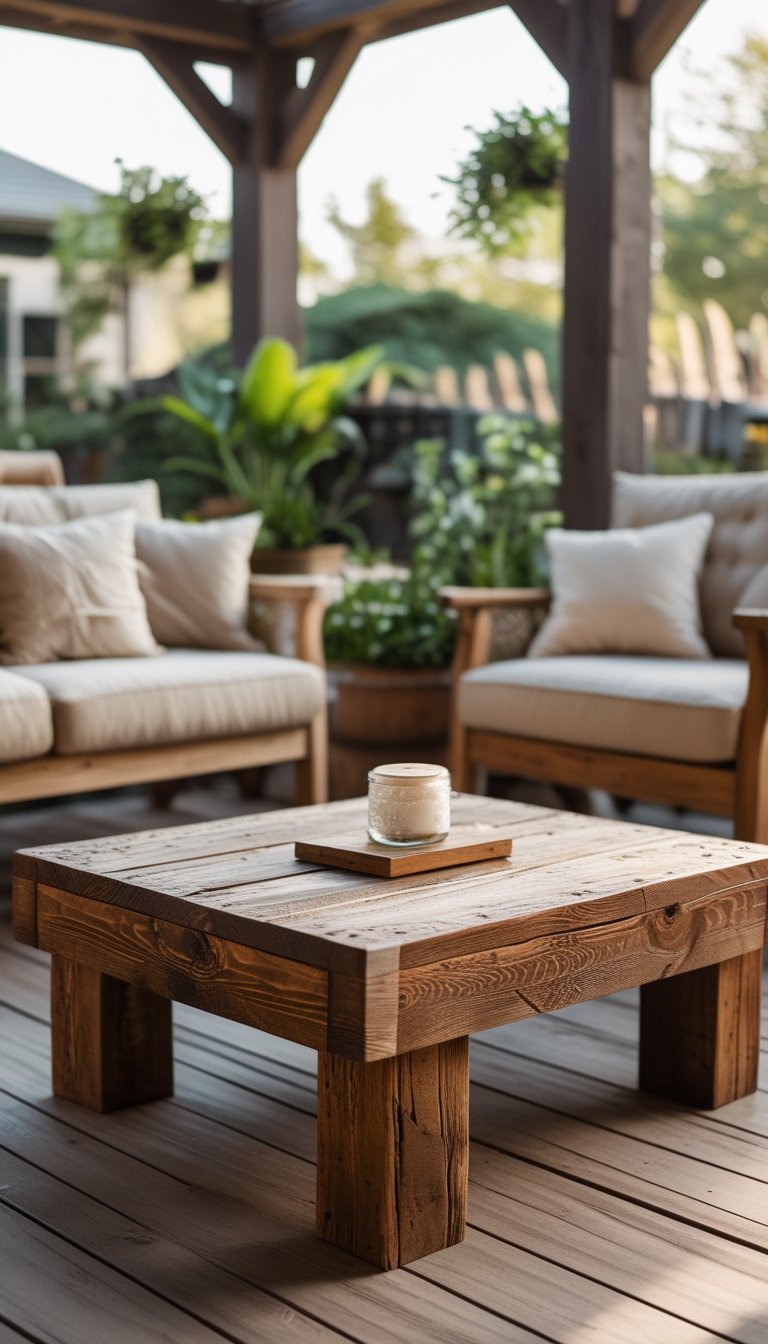
A reclaimed-wood coffee table brings warm, lived-in charm to your patio. You can use old pallets, barn wood, or salvaged boards to make a sturdy top with visible grain and knots that add character.
Keep the build simple: a flat top, straight legs, and a little sanding to remove splinters. Use exterior screws and weather-resistant glue so the table holds up outside. Seal the wood with a clear outdoor finish or a tinted stain to protect it from sun and rain.
Place it near seating and add a tray for drinks or a planter for greenery. This table looks great with mixed textures—worn wood, metal accents, and woven cushions.
PRO TIP
When you pick reclaimed wood, check for nails, screws, and rot before you start cutting. Remove any metal with a magnet and replace rotten pieces with solid boards. Measure twice and cut once; reclaimed wood can vary in size and density, so dry-fit pieces before gluing or screwing them together. If you want a more polished look, plane and clamp boards for a tight seam, then fill small gaps with colored wood filler that matches the wood tone. For long-term durability, apply at least two coats of exterior polyurethane and recoat every year or two. Keep the table under a cover in harsh weather and use coasters to prevent water rings and heat damage.
3) String-light pergola using cedar beams
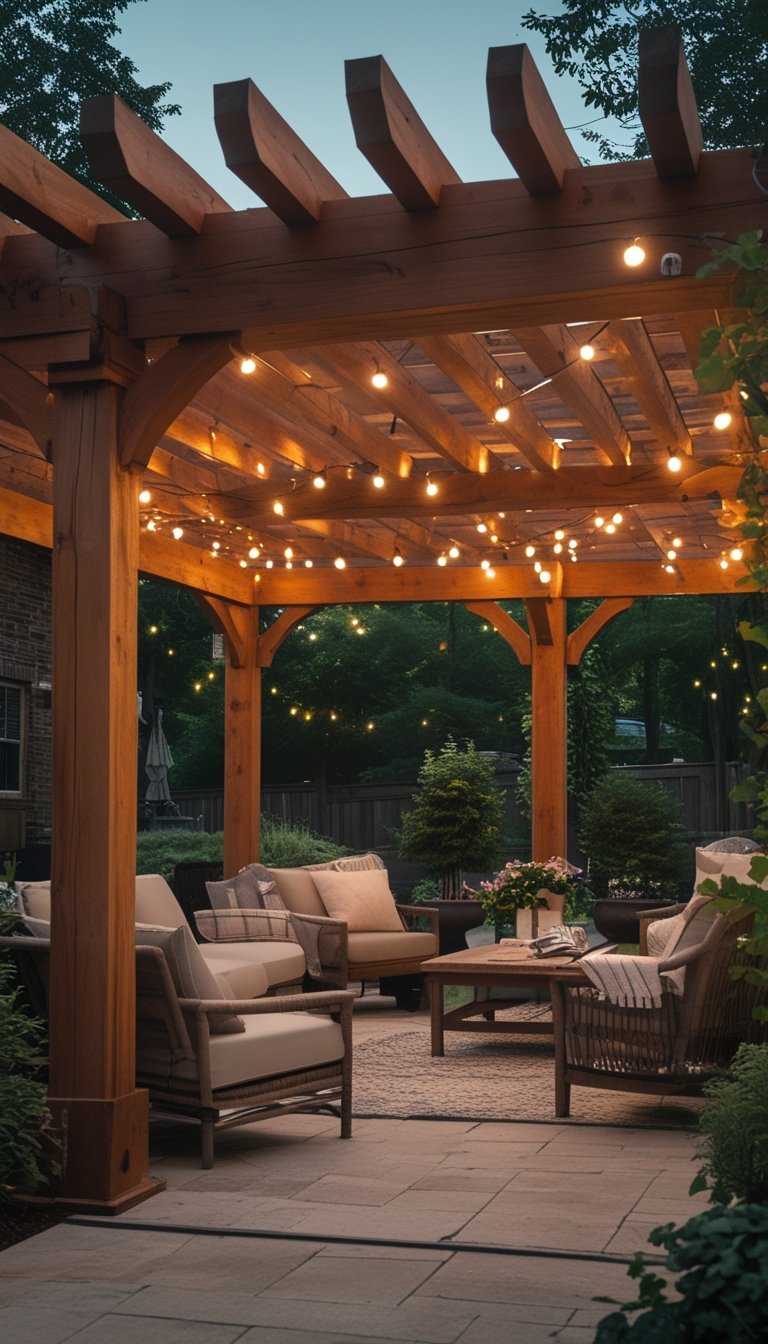
A cedar-beam pergola gives your patio warm color and natural resistance to rot. You can build a simple frame in a weekend using four posts and crossbeams, then add rafters for classic farmhouse lines. Cedar holds up well outdoors and looks better with time whether you leave it natural or add a light stain.
String lights create a cozy, inviting space for evenings. Run a guide wire or use weatherproof hooks across the beams to prevent sagging and keep lights secure. Choose outdoor-rated bulbs and test the layout during the day so you can tweak spacing and drape.
Place seating or a table under the pergola to make it the focus of your yard. Add potted plants or climbing vines for extra texture and shade as the plants grow.
PRO TIP
Plan your lighting and power needs before you install the beams. Measure the span and note where outlets or extension cords will reach, and use outdoor-rated extension cords and plugs with ground-fault circuit interrupter (GFCI) protection. If you hide wiring along beams, use UV-resistant cable clips and weatherproof junction boxes where needed. For a neat look, attach a thin steel guide wire along each run and clip the string lights to it; this keeps the lights from sagging and reduces stress on sockets. If you expect heavy weather, use heavier-gauge wire and mount hooks into the beam center, not just the edge. Test each strand for damage before hanging and keep spare bulbs and a small repair kit in your patio storage so you can fix issues fast.
4) Galvanized metal planter boxes with herbs
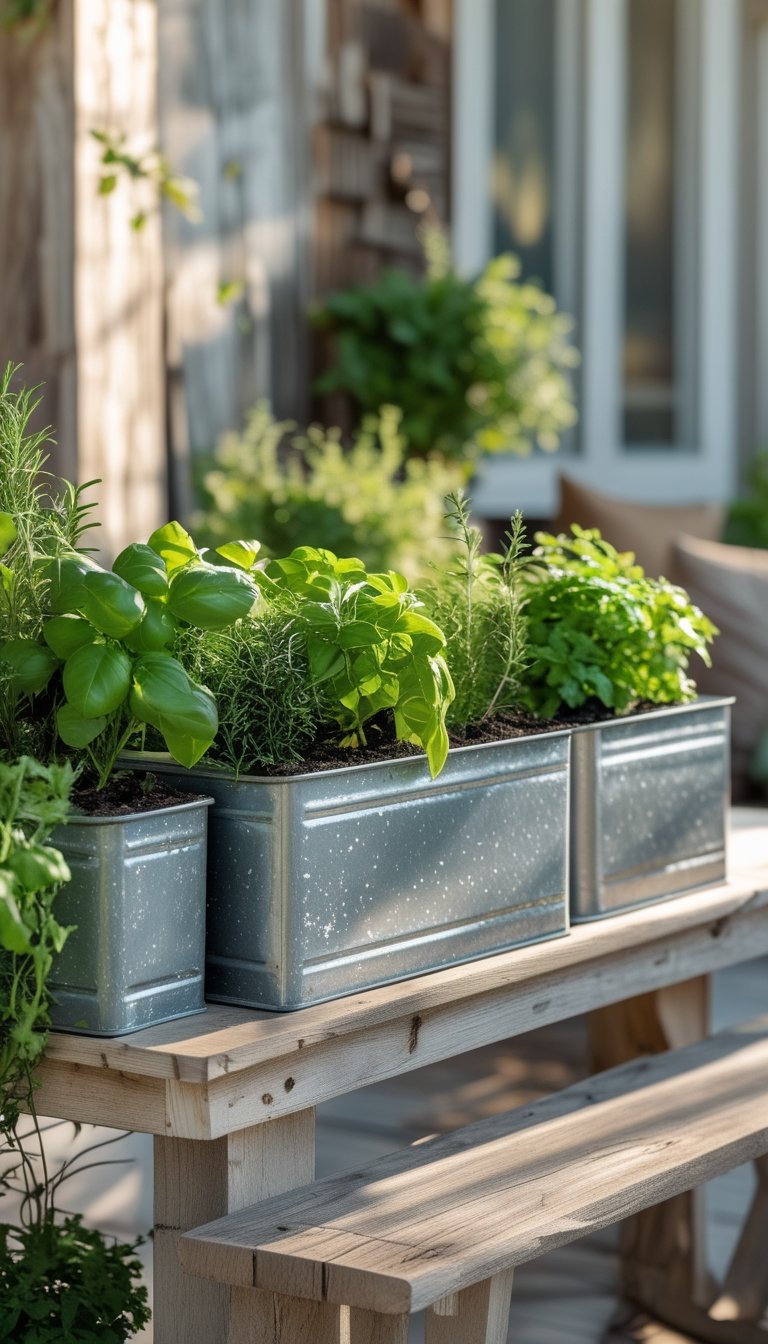
Galvanized metal planter boxes give your patio a clean farmhouse look and hold up well outdoors. You can line them with landscape fabric and good potting mix to keep soil from washing out and roots healthy.
Plant herbs like basil, rosemary, thyme, and parsley for easy access while you cook. Group plants with similar water needs together so you won’t overwater or underwater anyone.
Place boxes where they get at least four to six hours of sun, such as along a railing or on a low table. Move them to a sheltered spot in heavy rain or freezing temperatures to protect metal and plants.
You can paint or distress the metal for a personal touch, or leave it natural for a vintage feel. Add simple labels for each herb so you remember which is which while you harvest.
PRO TIP
When setting up galvanized planter boxes, start with good drainage to prevent root rot. Drill a few small holes in the bottom if the box doesn’t already have them, then add a layer of coarse gravel or broken pottery before adding potting mix. Use a high-quality potting soil mixed with compost to give herbs steady nutrients without compacting. Water thoroughly after planting, then check soil moisture by finger-testing; most herbs prefer soil that dries slightly between waterings. Rotate boxes occasionally to keep growth even and pinch back herbs regularly to encourage bushier plants. If you plan to keep metal boxes outdoors year-round, consider applying a clear sealant to slow corrosion and place them on risers to allow air flow under the box.
5) Hand-painted chalkboard menu sign
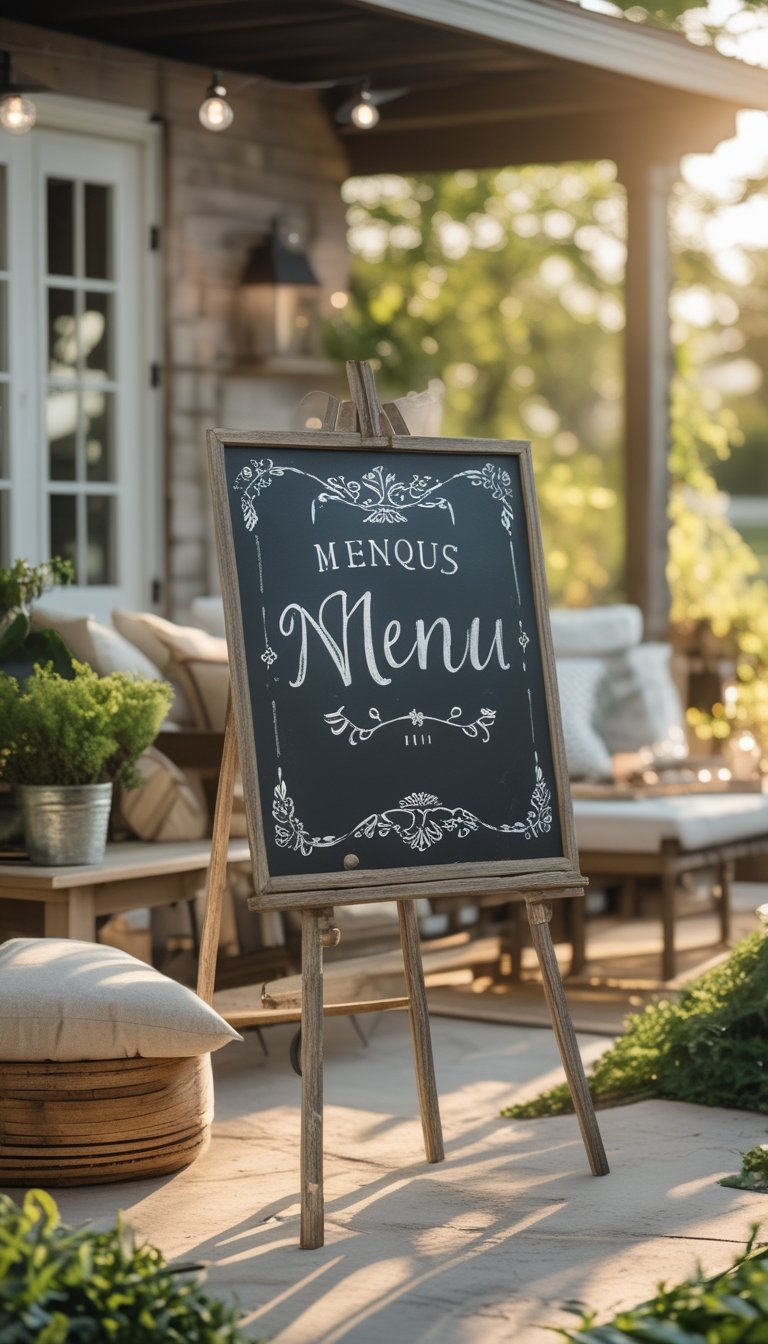
A hand-painted chalkboard menu adds charm and function to your patio. You can list drinks, snacks, or the day’s specials in neat, rustic lettering that guests will notice and enjoy.
Make the board by painting a smooth wooden board with chalkboard paint. Frame it with reclaimed wood or a simple trim to match your farmhouse style.
Use stencils or freehand for lettering. White or cream chalk markers show up best, and a light sealant over the frame protects it from splinters and weather.
Hang the sign near your grilling area or bar cart for easy updates. Change the menu seasonally or for each get-together to keep the space fresh and welcoming.
PRO TIP
When painting your chalkboard, sand the wood smooth first so the paint grips evenly and looks professional. Apply two thin coats of chalkboard paint, letting each coat dry fully before adding the next. After the paint cures, season the board by rubbing a piece of chalk over the entire surface and wiping it off; this prevents ghosting when you erase later. Use chalk markers for sharp, clear lettering, but keep a set of traditional chalk sticks for quick edits. If your sign will be outdoors, add a thin layer of clear, matte exterior sealant on the frame only—avoid sealing the chalk surface or you’ll lock in the finish and make erasing difficult. Mount the sign with rust-resistant hooks or a sturdy leather strap to prevent sagging in humid weather.
6) DIY flagstone fire pit ring
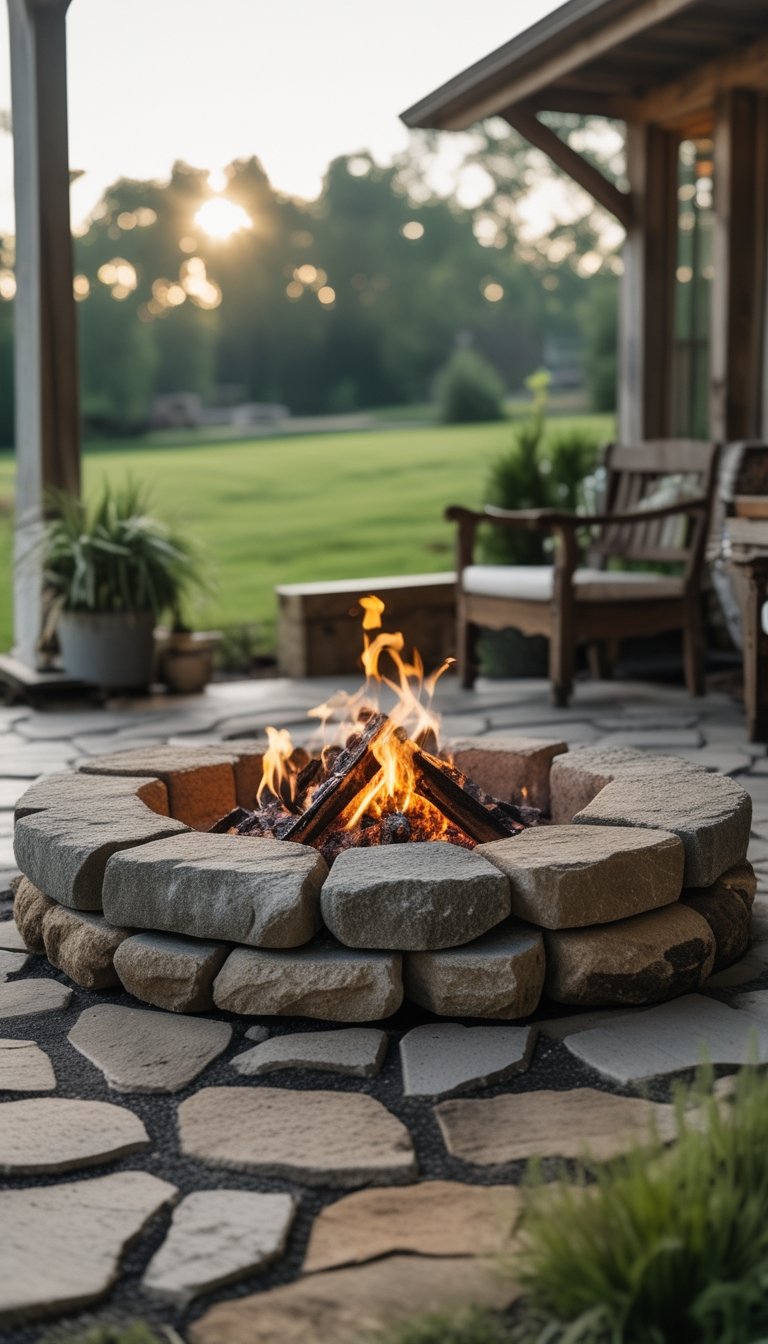
A flagstone fire pit ring adds rustic charm and a warm gathering spot to your patio. You can build one in a weekend using affordable pavers or leftover flagstones from another project.
Start by calling your local building department to check fire rules and permits. Choose a flat area at least 18 feet across from structures and trees, and clear the ground of roots and debris.
Dig a shallow, level foundation and lay a compacted gravel base for drainage. Stack the flagstones or retaining wall blocks in a ring, staggering joints for strength. Use heat-resistant mortar between stones if you want a tighter, longer-lasting ring.
Keep a metal fire ring insert if you want extra protection and easier cleanup. Always keep a water source or extinguisher nearby and never leave a fire unattended.
PRO TIP
Before you build, dry-fit the stones on the ground so you can see the final look and adjust sizes. Use smaller pieces to fill gaps and keep the ring level as you work. If you use mortar, mix it to a toothpaste-like consistency and wipe excess off the stone faces quickly. Consider a low stone bench or flagstone landing nearby for seating and a safe step away from the fire. Also, place a layer of sand inside the ring to help spread heat and protect the base. Finally, choose stone types that resist cracking from heat, like dense flagstone or concrete pavers, not soft or layered rock.
7) Mason jar porch-light sconces
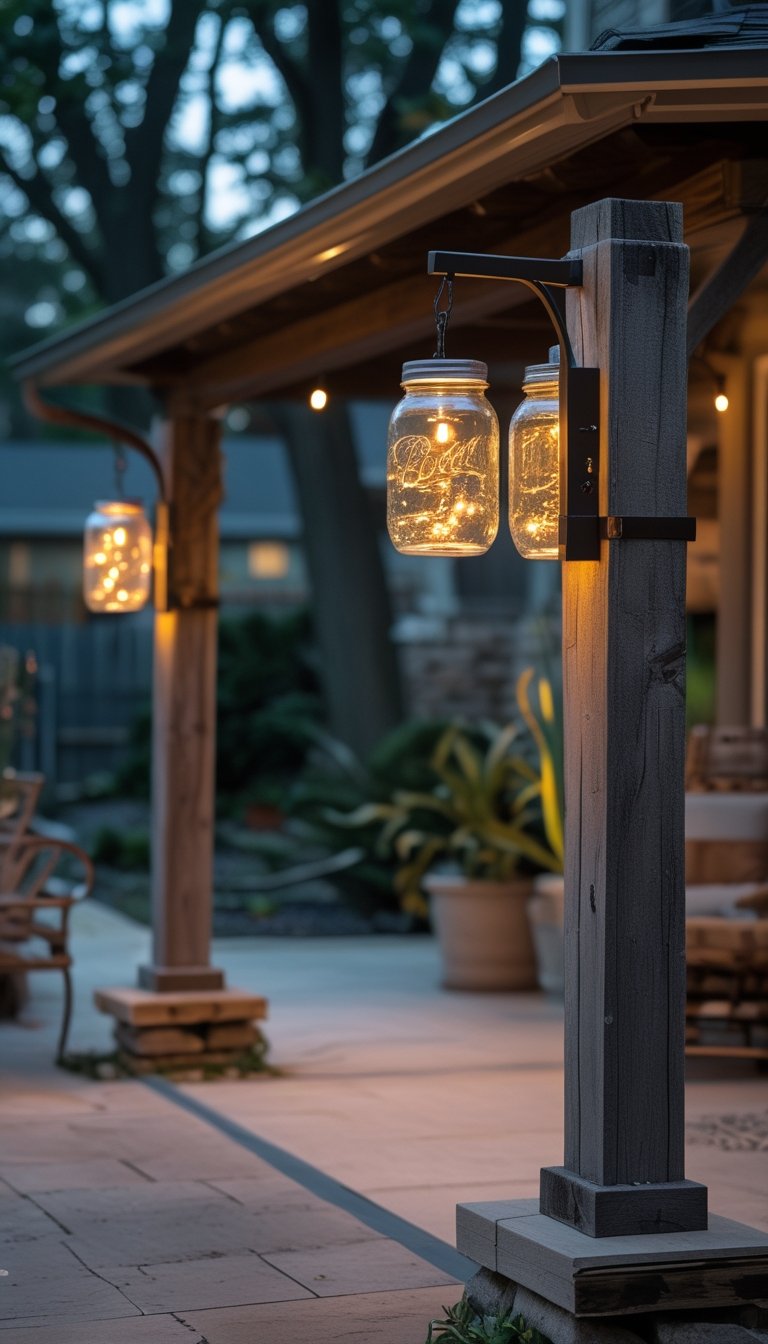
Mason jar porch-light sconces give your entry a warm, homey touch. You can hang them on either side of your door or line a short wall for soft, welcoming light.
Build them with basic supplies: mason jars, light sockets, wood or metal backplates, and weatherproof wiring. You don’t need fancy tools; a drill, screwdriver, and some sandpaper will do the job.
Choose LED bulbs or small solar lights for energy savings and low heat. Seal jar lids and wiring points with silicone to keep out moisture and bugs.
PRO TIP
When making mason jar porch-light sconces, focus on safety and durability. Use outdoor-rated electrical parts and, if you aren’t comfortable with wiring, hire a licensed electrician to connect the fixture. For the mounting plate, pick treated wood or powder-coated metal to resist rot and rust. Prime and paint the wood with outdoor paint, or finish metal with a rust inhibitor to extend life. If you plan to use mason jars in cold climates, leave a small ventilation gap or use bulbs that don’t get very hot to prevent cracking from thermal stress. Finally, test each sconce in place before final mounting to check light direction and shadowing, so you get even, comfortable illumination.
8) Stenciled concrete patio floor
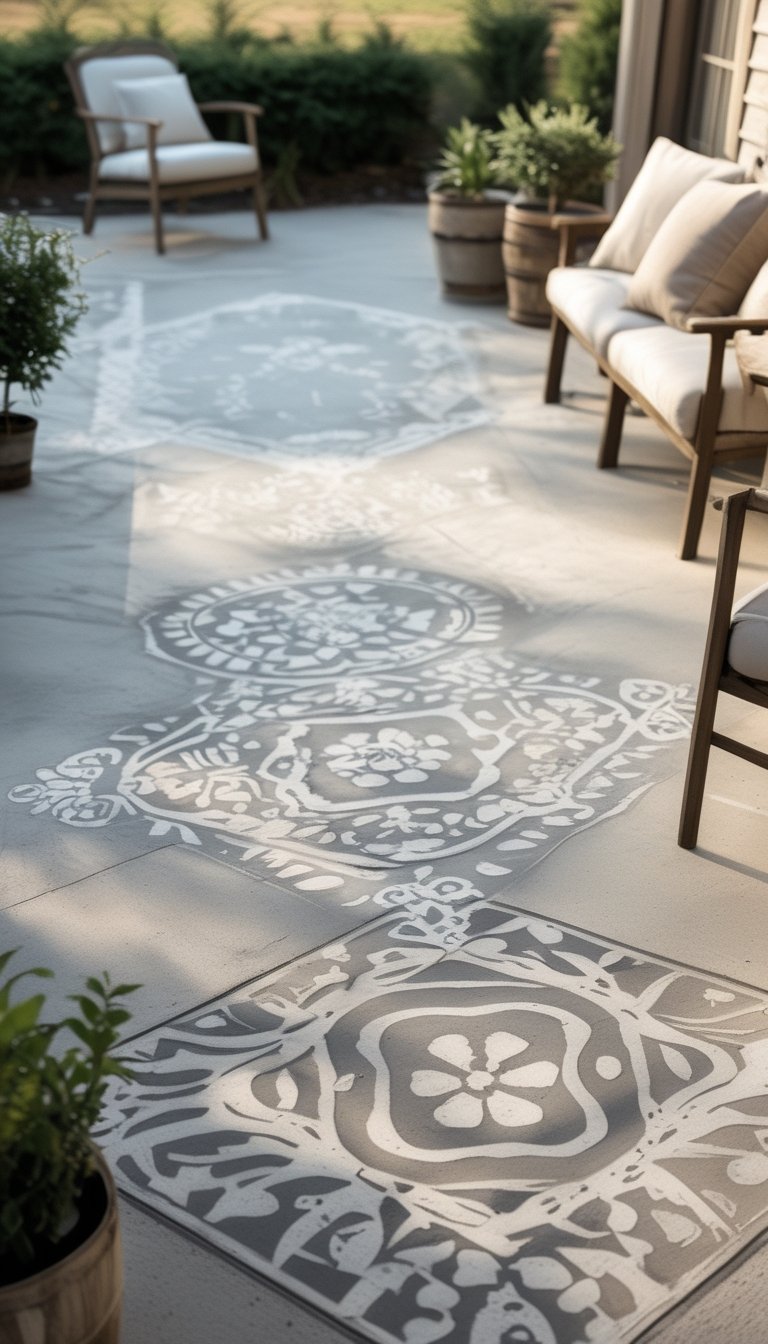
Stenciling your concrete patio gives it a fresh, custom look without spending a lot. You can mimic tile patterns, create a large rug effect, or add small repeating motifs to tie your space together.
Start by cleaning and repairing cracks so paint sticks well. Roll on a base coat, let it dry, then position your stencil and use a small roller or stencil brush for the pattern. Work in small sections and hold the stencil flat to avoid paint bleed.
Choose outdoor concrete paint made for foot traffic and UV exposure. Seal the finished surface with a clear concrete sealer to protect color and make cleaning easier.
PRO TIP
You will get the best results with patience and small steps. Practice your technique on a scrap board before you touch the patio so you learn how much paint to load on the roller. Less paint prevents smudging and keeps crisp edges. Use painter’s tape or spray adhesive to temporarily anchor the stencil; this helps when you repeat a pattern and keeps spacing even. When matching multiple stencil sections, mark registration points on the concrete with chalk for consistent alignment. Work on a dry, mild day and avoid direct sun while painting; heat can make paint dry too fast and cause an uneven finish. Plan for two or three light coats rather than one heavy coat so the base and pattern look smooth and last longer.
9) Pallet vertical herb garden
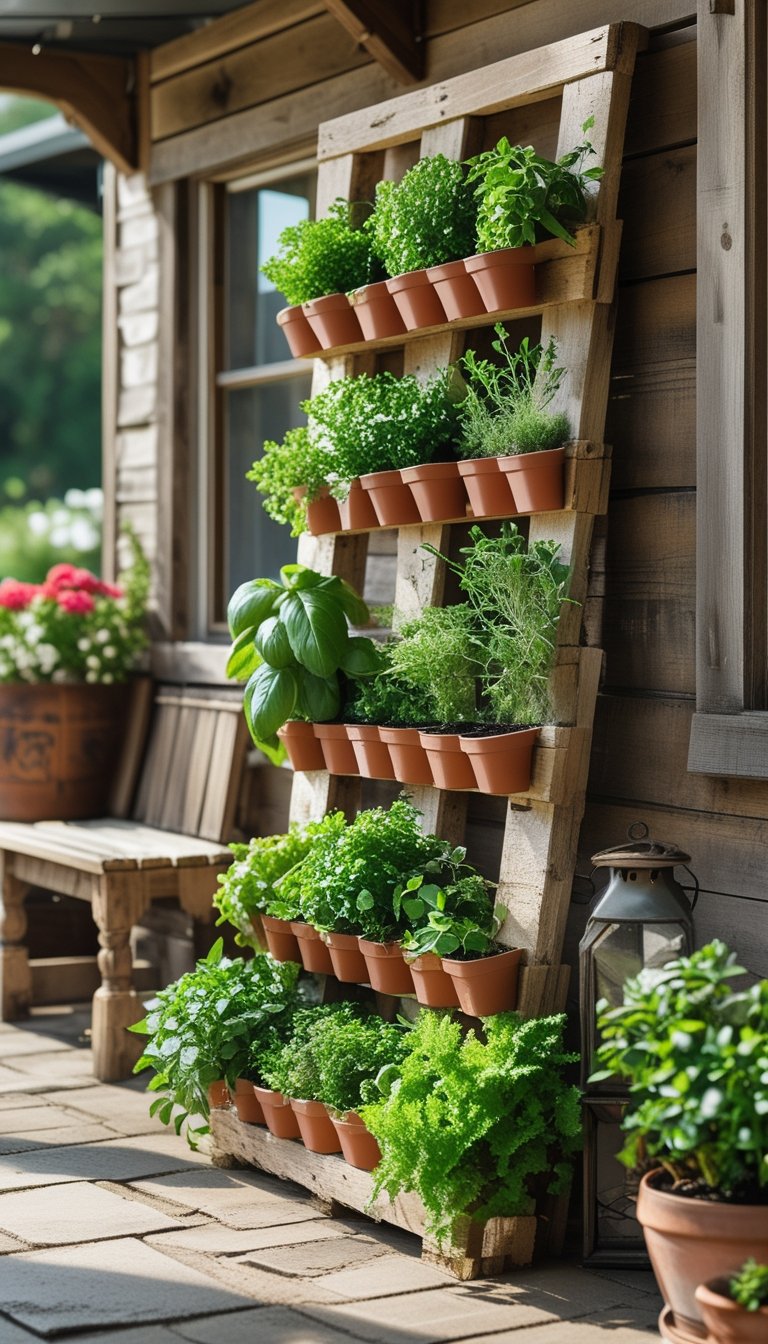
A pallet vertical herb garden gives you fresh herbs without taking up yard space. Stand a clean pallet upright, line the back with landscape fabric, and fill the slats with potting mix. Plant parsley, basil, thyme, and small lettuces in each pocket for easy access while you cook.
Place the pallet in a sunny spot and water from the top so moisture trickles down. Secure it to a wall or fence to prevent tipping in wind. The finished look suits a farmhouse patio and adds a touch of rustic charm.
PRO TIP
When building your pallet garden, choose heat-treated pallets labeled HT to avoid chemicals. Add a drainage layer of small stones or broken clay pots in each slot before soil to reduce waterlogging. Use lightweight potting mix formulated for containers; it drains better and keeps plants healthier. Start with herbs that share similar water and light needs to simplify care. Rotate pots or stagger planting times so you always have fresh leaves. Finally, line the back and sides with landscape fabric and staple it tightly to prevent soil loss while still allowing water to escape.
10) Weatherproof slipcovers for wicker chairs
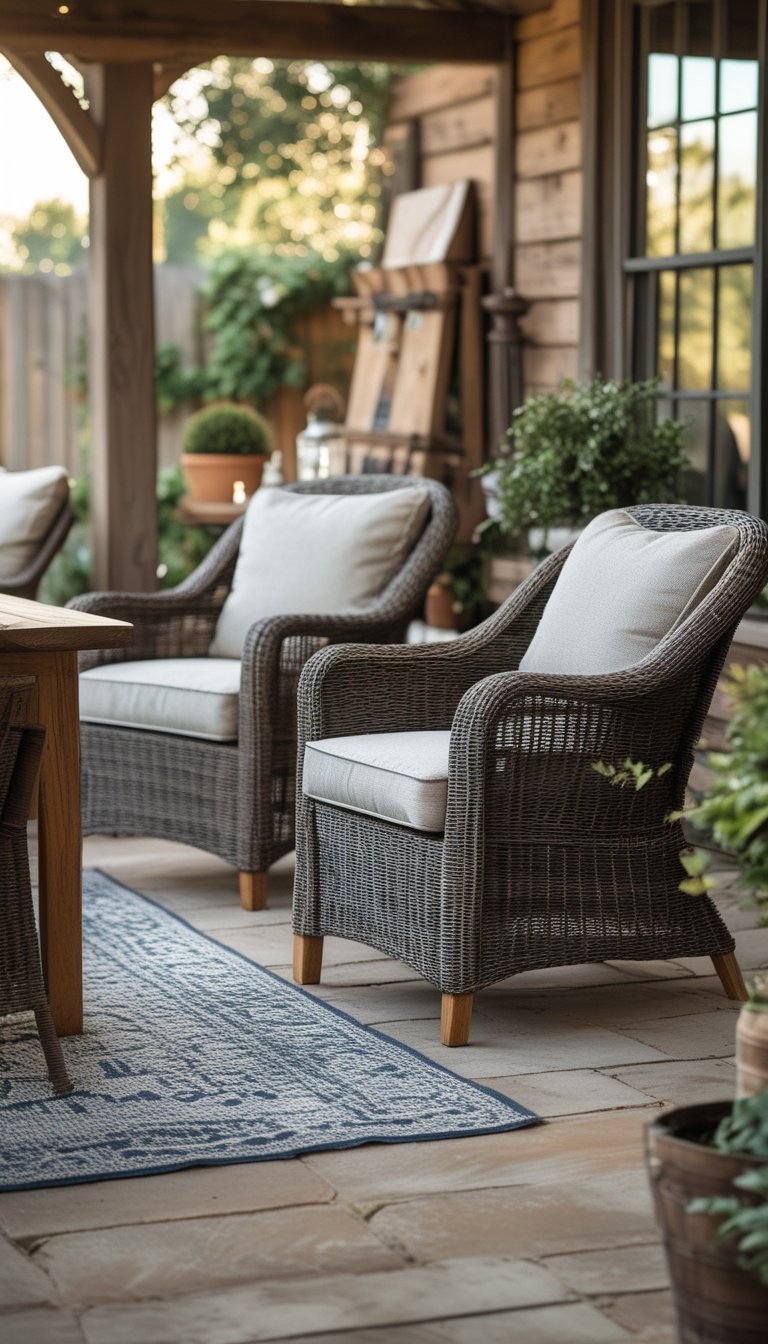
You can protect wicker chairs fast with weatherproof slipcovers. Look for covers labeled waterproof and UV-resistant so rain and sun won’t ruin the weave.
Choose a cover with a stretch fit or tie-downs to keep it from blowing off on windy days. Many covers come in neutral farmhouse colors that blend well with wood or metal accents.
Slipcovers also refresh worn furniture without a full refinish. They are easier to wash or replace than redoing cushions, and they help your furniture last through multiple seasons.
PRO TIP
When you buy slipcovers, measure your chair’s height, width, and depth first so you get a snug fit. If your space gets heavy sun, pick a high-UV fabric to reduce fading. For wet climates, choose covers with sealed seams or a water-repellent coating to stop water seeping into the wicker. Add simple tie-downs or elastic hems to prevent wind lift, and consider breathable fabrics so trapped moisture can evaporate. For a farmhouse look, pick muted tones like cream, gray, or olive and add a washable cushion cover in a coordinating pattern. Clean covers per label instructions and store them dry when not in use to avoid mildew.
11) DIY outdoor curtain rods from copper pipe
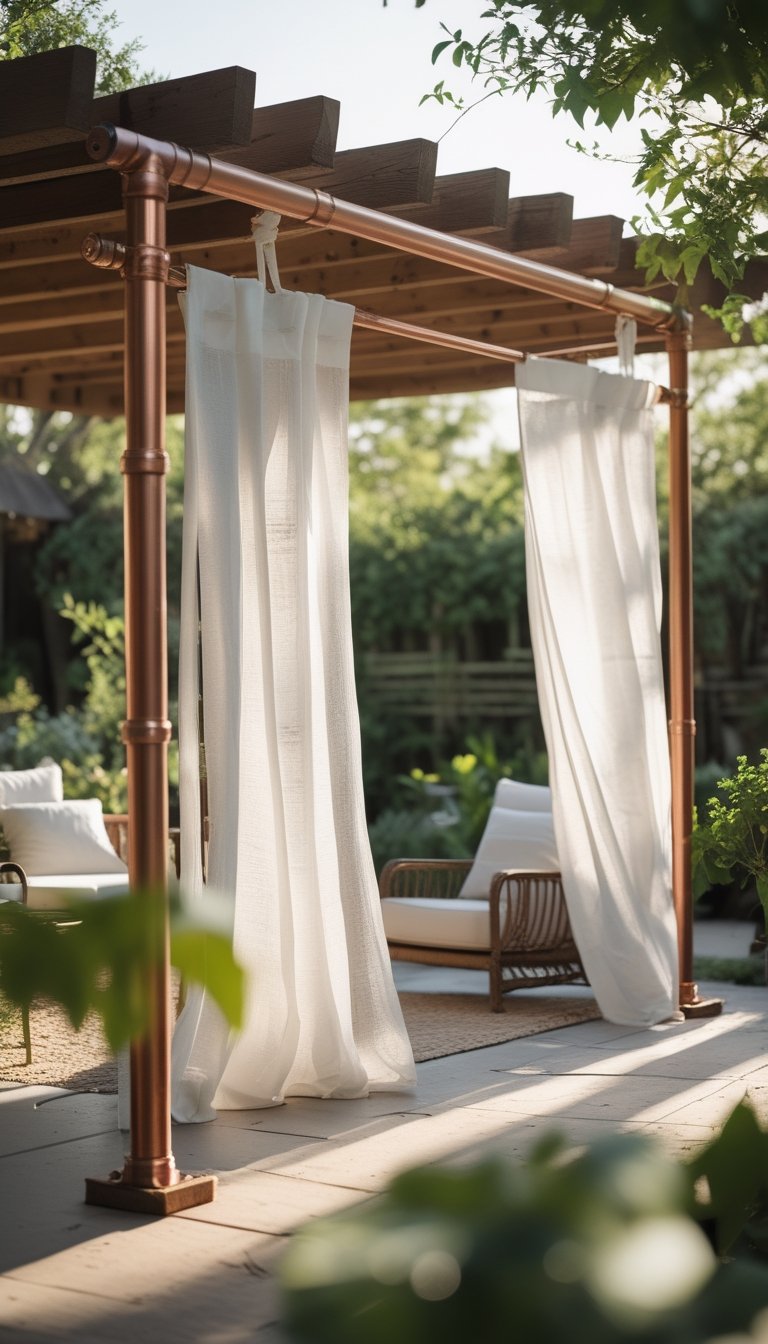
You can make strong, stylish curtain rods using copper pipe and simple fittings. Copper works well outdoors if you clean and seal it, and it gives a warm, rustic look that fits farmhouse style.
Measure twice and cut once. Use a pipe cutter for straight edges, then fit elbows and adapters to match your layout. Mount with galvanized or stainless flanges to resist rust where the rod meets the wall or post.
Paint or clear-seal the copper to slow patina if you want the bright finish to last. Use curtain rings made for thicker rods or slip the fabric directly over the pipe for a clean, casual look. This project is quick, affordable, and easy to adapt to any porch size.
PRO TIP
Before you start cutting, make a full-size paper template of your rod path to check clearances for doors and windows. This helps avoid mistakes and keeps your curtains from catching on hardware. Choose 1/2-inch or 3/4-inch copper pipe for a balance of strength and light weight; thicker pipe holds heavier curtains but needs sturdier brackets. Drill pilot holes and use outdoor-grade anchors for a solid mount into wood or masonry. If you prefer the aged look, skip sealing and let the copper develop a patina; otherwise use a clear outdoor lacquer to keep the bright finish. Add end caps or decorative finials to hide rough cut edges and give a finished, polished look to your porch.
12) Farmhouse-style bench with turned legs
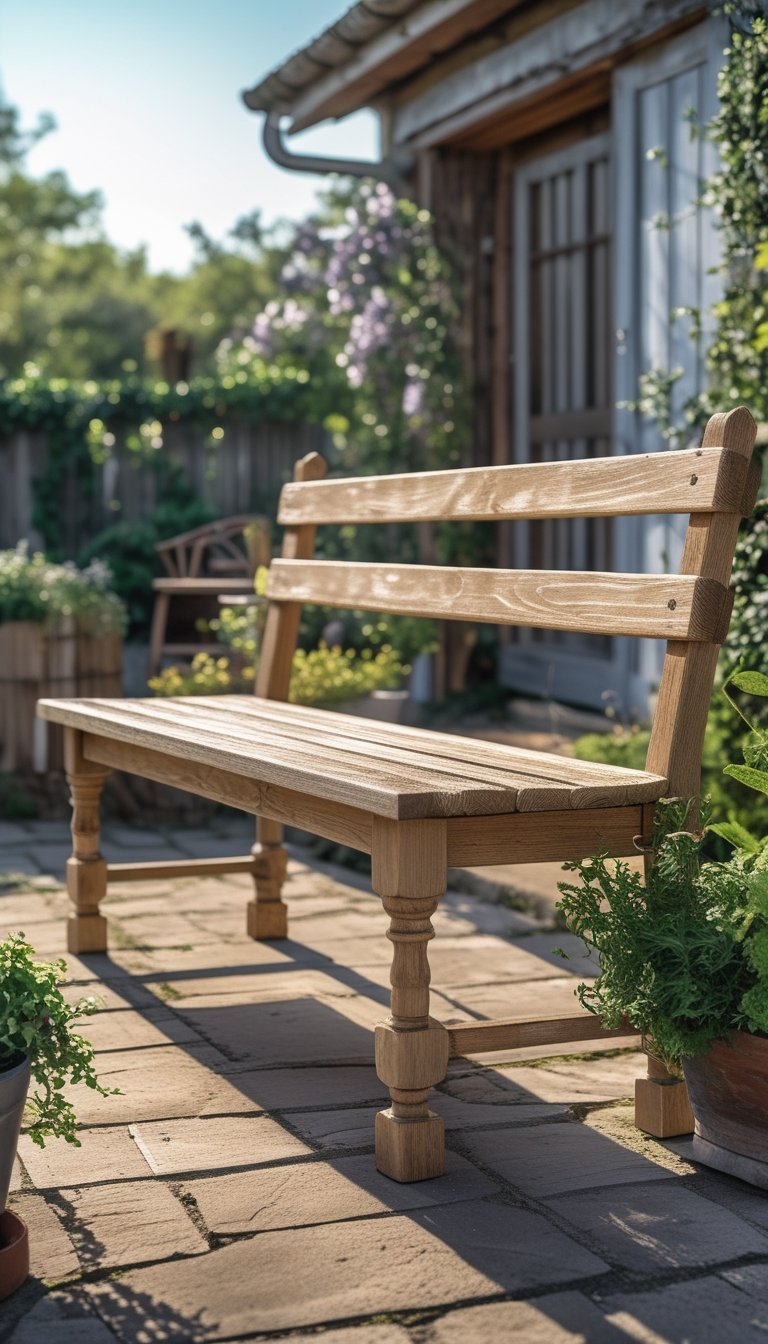
A farmhouse bench with turned legs adds charm to your patio and stays sturdy through seasons. You can build one using common lumber and a set of turned legs bought online or from a local craftsperson.
Keep the seat simple and wide for comfort. Use pine or cedar for outdoor durability, and seal the wood with a weatherproof finish to protect it from rain and sun.
Turned legs give a classic look without a complex build. Attach legs to a solid apron for strength, and add hidden screws or pocket holes to keep the joinery neat.
PRO TIP
Choose legs that match your overall porch style—chunky turned legs read more traditional, while slimmer ones feel slightly modern. If you buy pre-turned legs, test-fit them before finishing so you can adjust height or stance. Sand all pieces smooth and use exterior-grade glue at joints for added hold. For paint, use exterior primer first, then two coats of acrylic latex for easy cleanup and good weather resistance. If you prefer stain, apply a penetrating oil or spar urethane topcoat to repel moisture. Finally, add felt pads under the legs if you move the bench onto delicate decking to prevent scratches.
13) Vintage crate side tables (repurposed)
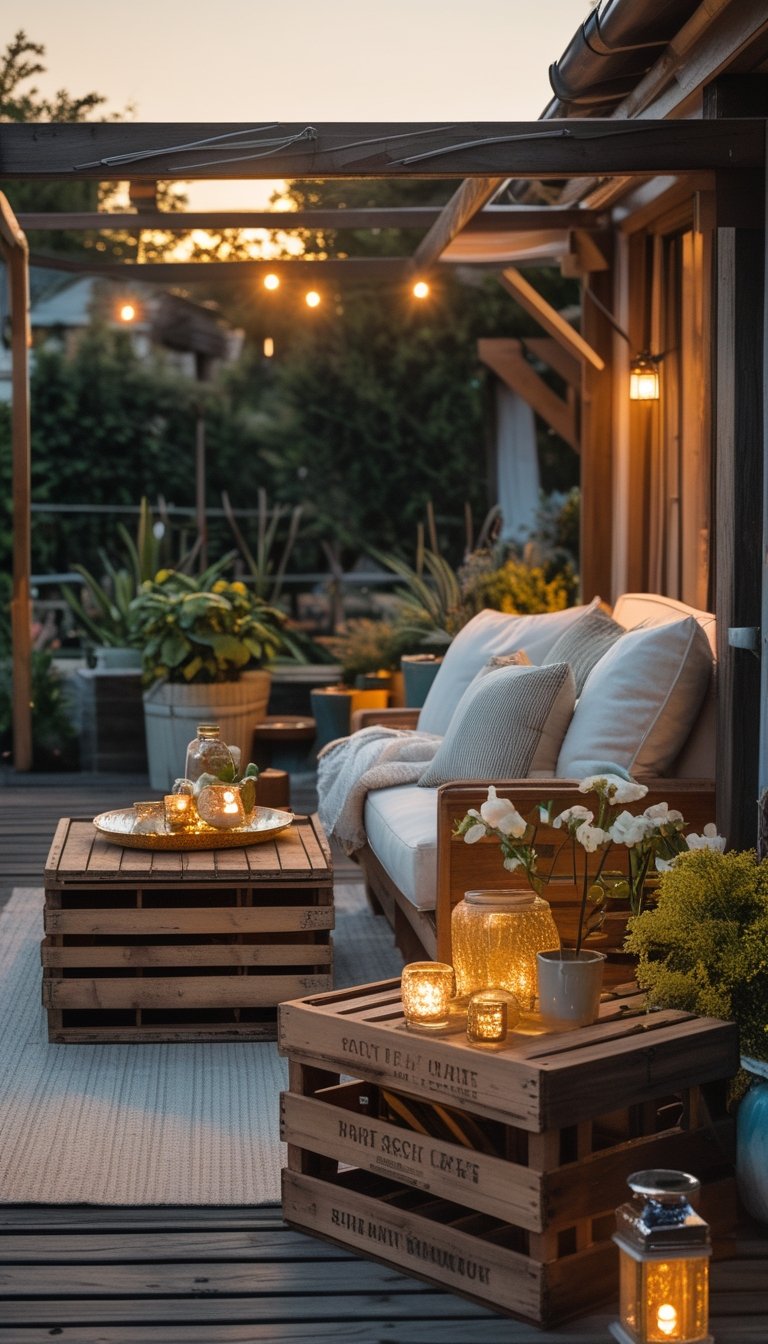
You can turn old wooden crates into charming side tables for your patio in just a few hours. Sand rough spots, add a clear outdoor sealer, and stack or attach a flat top for stability.
Crates work great as storage and as surfaces for drinks or plants. Paint them or leave them weathered for a true farmhouse look. Add casters if you want to move them around easily.
Place a crate table beside outdoor seating to hold lanterns or a potted herb. Use multiple sizes together for a layered, casual arrangement that feels lived-in and inviting.
PRO TIP
Choose crates that are solid and free of rot; replace any broken slats before use. If you plan to leave the table outside, use exterior-grade screws and waterproof glue to keep joints secure. Apply a stain or exterior paint for color and protection, then finish with a clear marine or spar varnish to resist moisture. For a smoother surface, glue and clamp a thin plywood or reclaimed board top, then round the edges to prevent splinters. If storage matters, hinge a crate lid so you can stash garden tools or cushions inside. Add felt pads under casters or feet to protect decking.
14) Painted Adirondack chairs in muted barn red
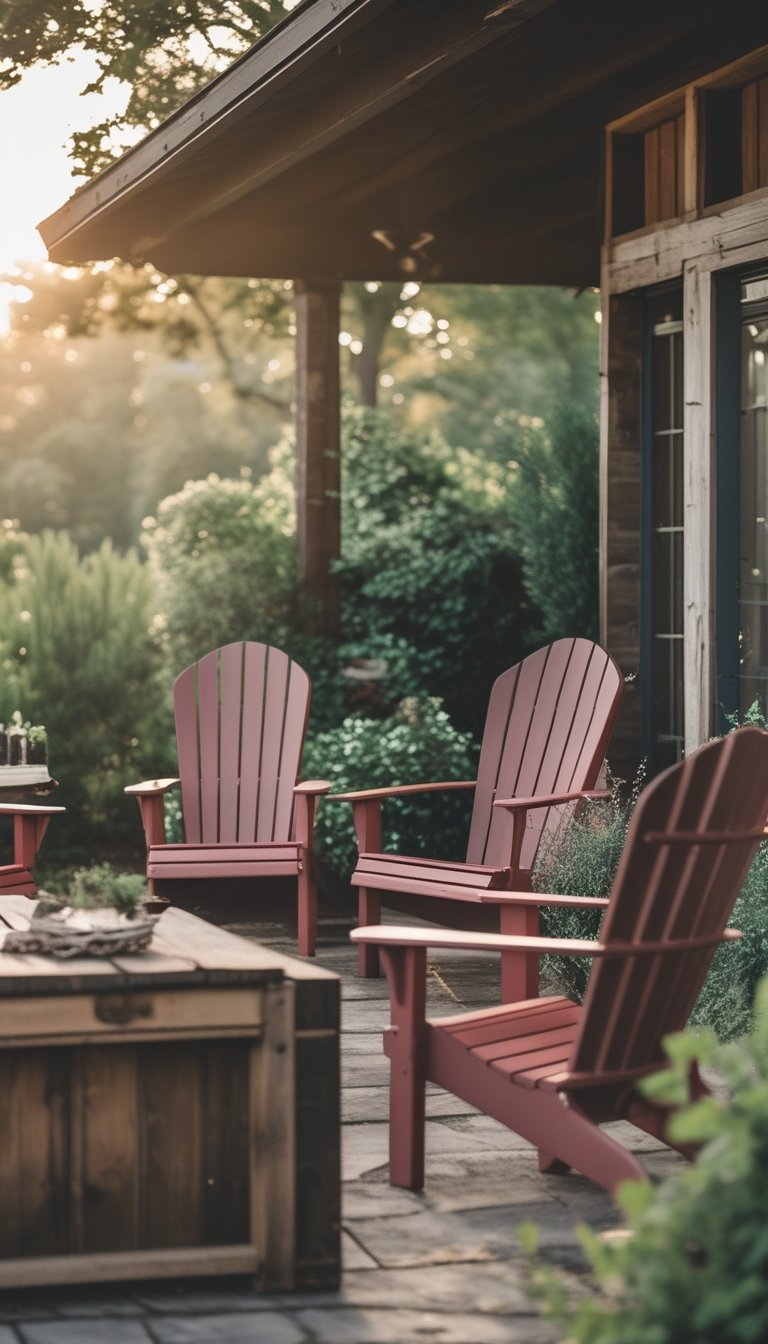
Painting Adirondack chairs in muted barn red adds a warm, farmhouse look without being too bright. You can place them on a porch, patio, or beside a raised bed to tie your yard together. The color works well with weathered wood, white trim, and simple greenery.
Choose a low-sheen exterior paint for durability and a softer, aged finish. Sand and prime first so the paint lasts through seasons. A light distressing with sandpaper gives a lived-in farmhouse feel that still looks tidy.
PRO TIP
If you want a long-lasting result, use exterior-grade acrylic paint and a good primer made for wood. Apply two thin coats instead of one thick coat to avoid drips and peeling. Let each coat fully dry before sanding lightly with fine-grit paper, then finish with a clear satin sealer to protect against sun and moisture. For a vintage touch, rub a bit of stain into corners and joints before sealing. Store chairs under cover or use furniture covers in bad weather to extend the finish life.
15) DIY gravel pathway with reclaimed bricks
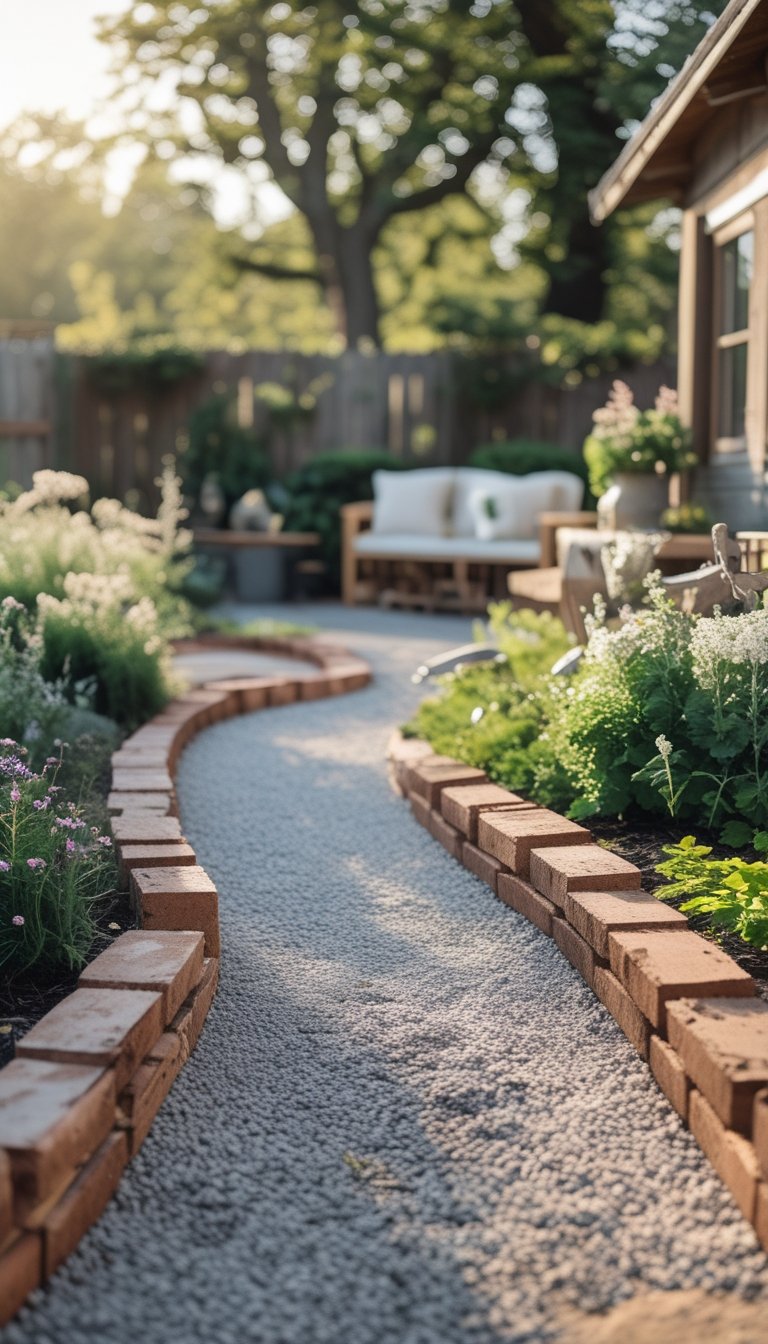
You can make a simple, rustic pathway using gravel and reclaimed bricks. Lay a compacted base of crushed stone, then add a layer of sand to level the surface before setting the bricks. The bricks act as stepping edges or accents while the gravel fills the walking area.
Mix brick layouts to hide chips and color differences; a staggered or zigzag pattern looks natural. Keep the path about 3–4 feet wide for comfortable walking. Use landscape fabric under the gravel to reduce weeds.
Tamp the gravel and bricks down firmly so they stay in place. Edge the path with bricks set on edge to keep gravel contained and give a finished look. Sweep sand or fine gravel between the bricks to lock everything together.
PRO TIP
Before you start, sort your reclaimed bricks by size and condition so you can plan the look and reduce cutting. Test-fit a few rows on the ground to see how patterns fall and adjust for uneven brick heights. Rent or borrow a plate compactor to compact the base and the gravel; hand-tamping takes much longer and may leave low spots. If your site slopes, step the path or add shallow drains to keep water from pooling on the surface. Use jointing sand or polymeric sand between bricks to limit movement and weeds. Finally, wear gloves and safety glasses when handling old bricks—edges can be sharp and dust may be present.
16) Wood-and-wire outdoor privacy screen
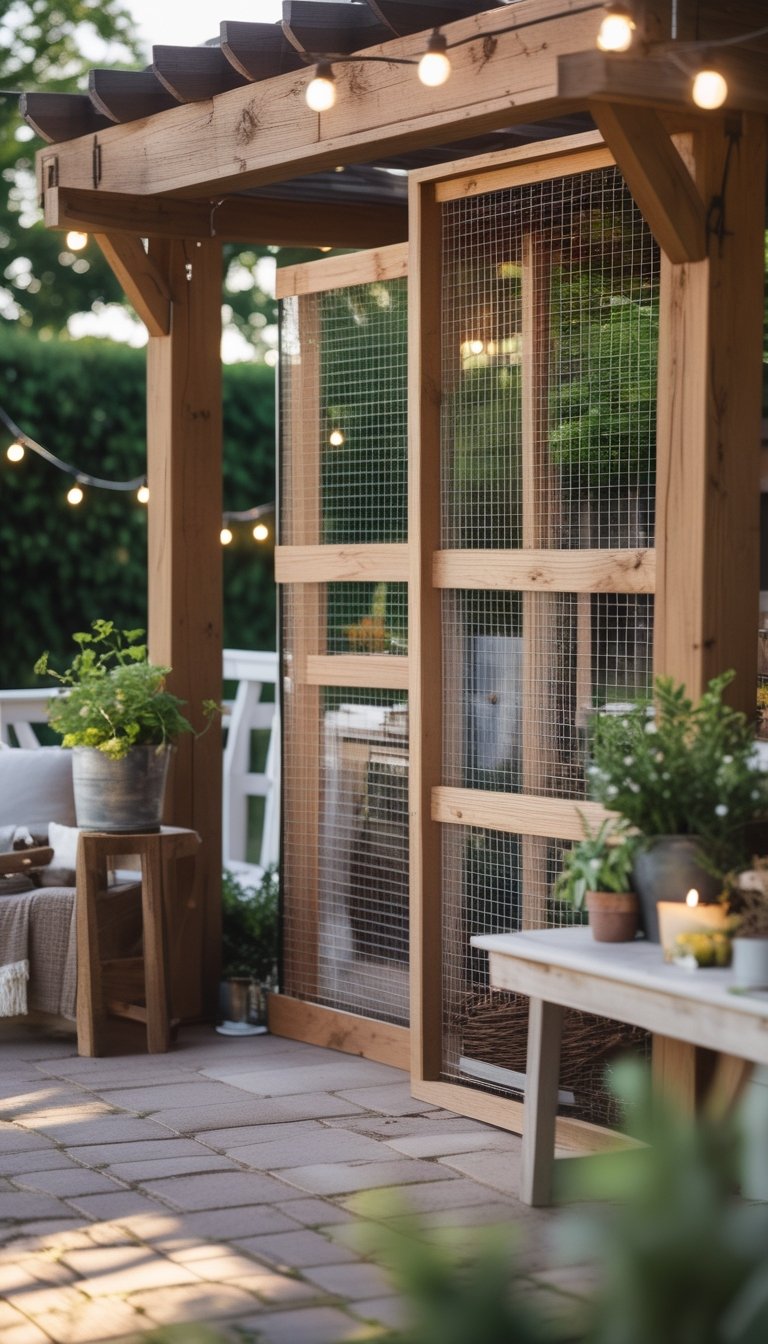
A wood-and-wire privacy screen gives your patio a rustic farmhouse look without closing in the space. You build a simple frame from treated lumber, then stretch galvanized wire mesh across it for light and airflow. This keeps sightlines low while letting breezes and sun through.
You can add climbing plants or hang lanterns to soften the industrial feel. The wire makes a great trellis for vines, and the wood can be stained to match your deck or fence. Fasten the panels to posts or use freestanding frames for a quick weekend project.
PRO TIP
Choose galvanized or PVC-coated wire to prevent rust and reduce maintenance over time. When framing, use pressure-treated or rot-resistant wood like cedar to withstand the elements. Space vertical posts on 6- to 8-foot centers for sturdy support, and sink posts into concrete for permanent installs. If you prefer temporary screens, build panels that lean or bolt together so you can move them seasonally. Add weatherproof wood glue and exterior screws for long life, and seal the wood with a clear or tinted outdoor sealer to protect color. Finally, plant fast-growing climbers like clematis or jasmine to add privacy and fragrance within a single growing season.
17) Homemade citronella candles in mason jars
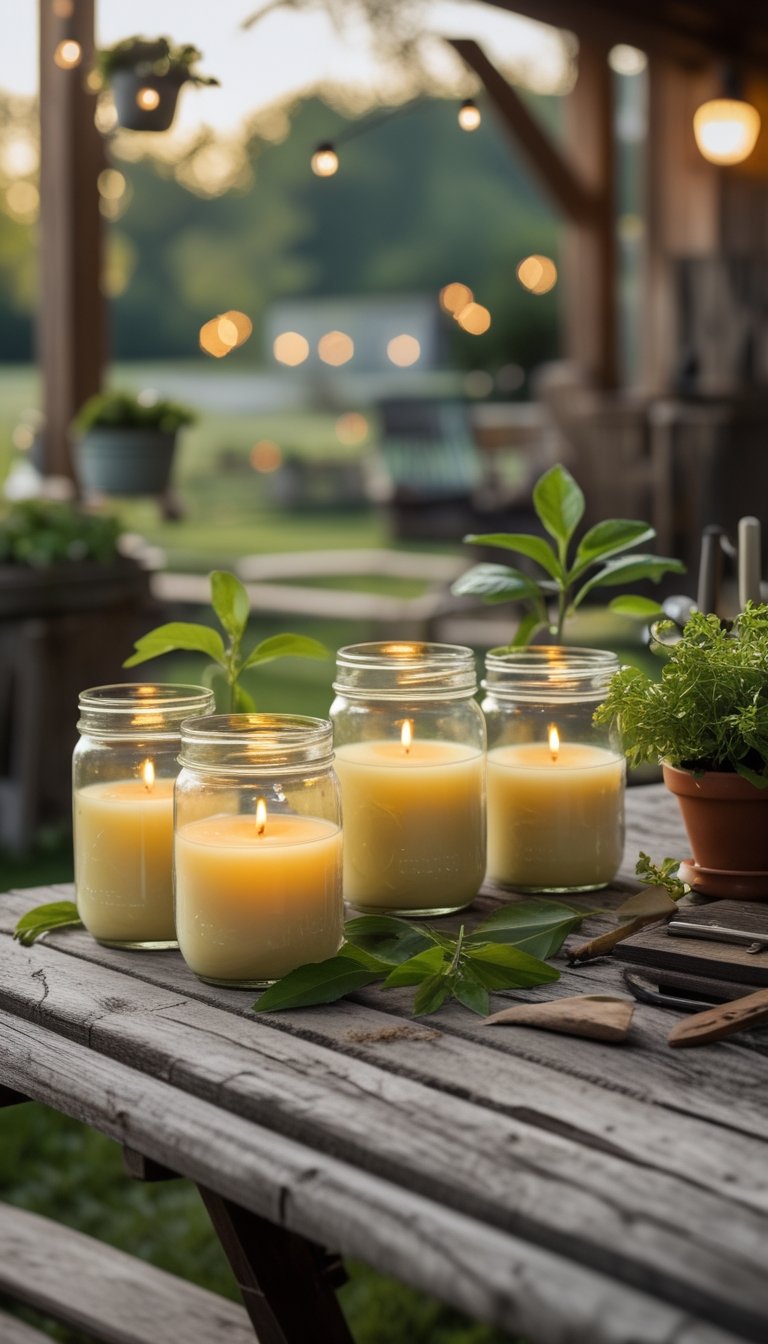
Make simple citronella candles in mason jars to add light and help keep mosquitoes away. You can use soy wax, a cotton wick, and a few drops of citronella essential oil for a mild, natural scent. Add dried herbs like lemon balm or lavender for a rustic look and a gentle fragrance.
Place the jars around seating areas or on tabletops to create a cozy farmhouse vibe. Choose different jar sizes and tie twine or burlap around the rims to match your decor. Always place candles on a stable, heat-safe surface and never leave them unattended.
PRO TIP
When you make several jars, mix essential oils for a balanced scent—citronella with a touch of lavender or eucalyptus works well. Pour wax slowly and allow it to set at room temperature to avoid cracks in the wax. Trim wicks to 1/4 inch before lighting to reduce smoke and extend burn time. To reuse jars, clean out old wax by freezing the jar briefly; the wax will pop out easier. Keep candles at least 3 feet from flammable items and store extra jars in a cool, dark place to preserve scent.
18) Simple pallet dining table with X-brace ends
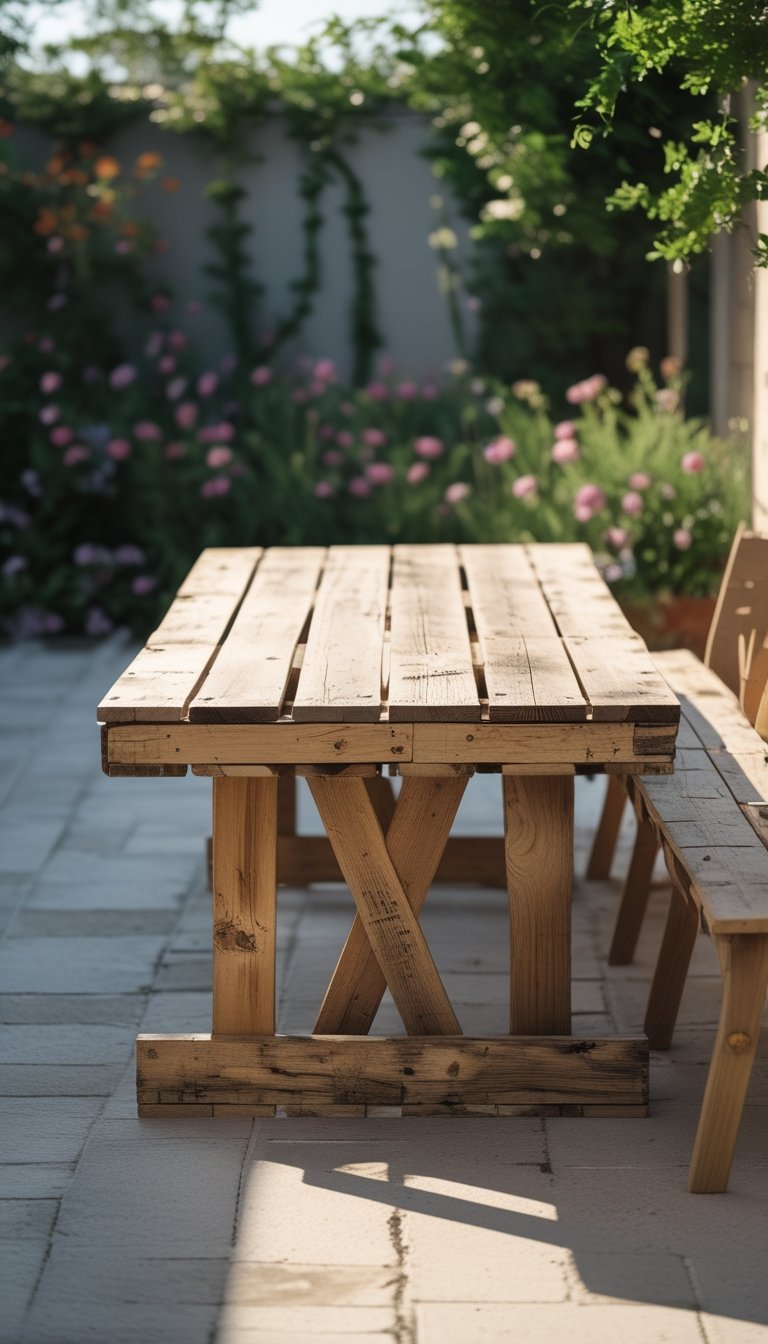
You can make a sturdy pallet dining table fast using reclaimed pallets and basic tools. Cut and sand pallet boards to form the top, then attach them to a simple frame for support. Keep the top tight with wood glue and screws for a flat surface.
Create X-brace ends from 2x4s to add farmhouse character and strong leg support. The X shape keeps the table from wobbling and looks good with a light stain or whitewash. Place the braces inside the ends so they don’t interfere with seating.
Seal the table with an exterior-grade polyurethane or oil to protect against rain and sun. If you plan to leave it uncovered, use pressure-treated lumber or a weatherproof finish for longer life. The project fits a weekend and costs much less than new furniture.
PRO TIP
Before you build, inspect pallets for safe stamps and avoid any marked with chemical warnings. Use a chalk line to mark your board layout so the top stays straight while you attach it. Pre-drill screw holes to prevent splitting, and clamp boards together as you work to keep edges flush. For cleaner joints, trim pallet boards to uniform width with a circular saw. Choose stainless steel or coated screws for outdoor use to prevent rust stains. Finally, test-fit the X-brace ends on the ground before screwing them to the frame so you can adjust angle and height easily.